Showing posts with label Nursery. Show all posts

Monday, June 10, 2013

Baby Shower


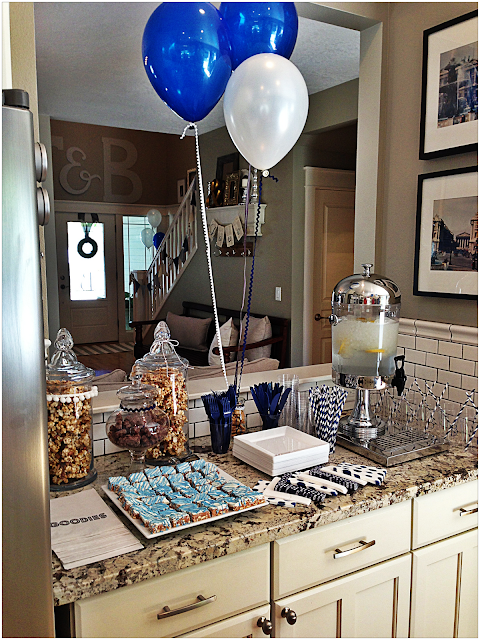
I wanted to share with you some photos from my baby shower.  I kept the decor very simple and it turned out just right :)

The list:
-Balloons with decorative Ribbon
-Balloon anchors (glass milk bottles) with vinyl "B" on it.  Filled with animal crackers
-Fresh Flower arrangements
-Fabric Flag banners
-Chalkboard welcome signs


I hope this inspires you for your next party!  


Monday, May 20, 2013

Nursery Reveal!


The Nursery is finally complete.  I am so excited to share it with you!  It was worth all the sweat, hard work, patience and planning of it.  I just loved how it came together and now I can't wait to fill the room with a precious little boy!

If you remember back in February I shared with you my inspiration board for it . .here is just a peek at it again:


Here is a peek a the BEFORE pictures of the room:


Here is our Boy Nursery:


Now here is the breakdown of everything:

Paint
Walls: Behr paint Clay Beige 7750; Trim SW White Duck
Crib: SW 7017 Dorian Gray


Accessories


Lamp: Target
Yarn Animals: Target
Denim Frames: Pottery Barn
Metal Air Plane: Jossandmain.com
Rope Glass Lanterns: Pottery Barn
Rope Tie Back: Hand made, I bought the rope from Home Depot and hung it with a command strip.
Pillows: Chevron pillows I made, finding the fabric from Hobby Lobby, 2 blue button pillows from Jossandmain.com, Grey Pillow from World Market, and Lumbar Geometric Pillow from TJMAXX.
Standing Clock: TJMAXX
Drapes: Etsy
Changing Pad Cover: Land of Nod
Ceiling Light Fixture: Ballard Design Orb Chandelier

FURNITURE

Dresser: Magnussen Moreau Dresser Purchased from RC Willey

Crib: Pottery Barn Harper Crib then I painted it with a sprayer.
bedding: Pottery Barn for crib sheet and bumpers.

Window Bench Seat: Cameron Coffee Table from World Market.  I made the tufted seat cushion to place on top.

Floor Pouf: Target


The biggest transformation for this Nursery was the wood paneling.  I had someone install the wood and then I did all the caulking and painting.  It was a very time consuming job but it was all worth it!  The molding sits 6 ft high from the floor.


I hope that you enjoyed the Nursery reveal.  Let me know if you have any other questions on where I found things!  
Enjoy


Thursday, April 4, 2013

Nesting: Organization


I don't know when nesting usually occurs for most people. .  but I have been feeling it the second I found out I was pregnant.  The urgency to get my whole life organized!  My first project was organizing the baby bedroom and bathroom closets.  I picked up some great metal baskets from a wholesale account that I have($12 each).  Then spray painted them a satin nickel finish.  The fabric bins, I picked up at Wal-mart for a great deal of all places.

Here is the before of my closet in the baby's room:


Here it is now(thank goodness there is no more mint green!):


Here is the bathroom closet:


I love the baskets because even messy things look organized . . and there is still plenty of room to grow into when the baby comes!  Hope this inspires you!

enjoy

Wednesday, April 3, 2013

Easy Nursery Art

My nursery is coming along and I cannot wait until the reveal! Just waiting on some last minute pieces . . . but in the mean time I would like to share with you some of the smaller projects that have kept me just as busy.

In my inspiration for the baby's room I had chosen some vintage storybook artwork that I saw at Restoration Hardware.  Knowing that this was something I was going to re-create, I had been thinking up a cute and cheaper alternative.  Well, this is what I came up with:


First, I went online and found some black and white silhouettes of animals that i liked:


Then using Microsoft Word I re-colored the images.  Just go into "format picture" and then click on re-color . . it will give you a bunch of color options. Here is an example:


Next, I chose a vintage book and used the book pages as the backing for the artwork.  Just set up your printer to have them print where you would like.


Then I chose a font that I could make a pattern from for the fabric letter. I found the frames at Target for about $12 each.

Here is what a finished frame looks like:


And in the room here is how it looks with all the animal artwork:


Using the same idea I also created some artwork in what is going to be the baby's bathroom:


Enjoy! I hope this inspires you!

Saturday, February 16, 2013

Dreaming of a Nursery

My husband and I found out this week that we are expecting a little boy . . we are so excited to have a new addition to our family.  I have had lots of time to think of what I would like to do with a nursery as the room has been mostly empty until the time for a baby.  Here is where my dreams have led me . . enjoy my inspiration board.  

Here is where I am currently on the room, getting it all prepped and primed.


This is the color palette I want to use grey, white, and blue:


I am having molding installed around the whole room similar to this photo:


My inspiration board: