Monday, May 20, 2013

Nursery Reveal!


The Nursery is finally complete.  I am so excited to share it with you!  It was worth all the sweat, hard work, patience and planning of it.  I just loved how it came together and now I can't wait to fill the room with a precious little boy!

If you remember back in February I shared with you my inspiration board for it . .here is just a peek at it again:


Here is a peek a the BEFORE pictures of the room:


Here is our Boy Nursery:


Now here is the breakdown of everything:

Paint
Walls: Behr paint Clay Beige 7750; Trim SW White Duck
Crib: SW 7017 Dorian Gray


Accessories


Lamp: Target
Yarn Animals: Target
Denim Frames: Pottery Barn
Metal Air Plane: Jossandmain.com
Rope Glass Lanterns: Pottery Barn
Rope Tie Back: Hand made, I bought the rope from Home Depot and hung it with a command strip.
Pillows: Chevron pillows I made, finding the fabric from Hobby Lobby, 2 blue button pillows from Jossandmain.com, Grey Pillow from World Market, and Lumbar Geometric Pillow from TJMAXX.
Standing Clock: TJMAXX
Drapes: Etsy
Changing Pad Cover: Land of Nod
Ceiling Light Fixture: Ballard Design Orb Chandelier

FURNITURE

Dresser: Magnussen Moreau Dresser Purchased from RC Willey

Crib: Pottery Barn Harper Crib then I painted it with a sprayer.
bedding: Pottery Barn for crib sheet and bumpers.

Window Bench Seat: Cameron Coffee Table from World Market.  I made the tufted seat cushion to place on top.

Floor Pouf: Target


The biggest transformation for this Nursery was the wood paneling.  I had someone install the wood and then I did all the caulking and painting.  It was a very time consuming job but it was all worth it!  The molding sits 6 ft high from the floor.


I hope that you enjoyed the Nursery reveal.  Let me know if you have any other questions on where I found things!  
Enjoy


Wednesday, May 8, 2013

Bathroom Updates

I am excited to show you the progress we have made on our bathrooms.  In part of getting ready for the baby, I wanted to give his bathroom a new look.  While we did that we decided to update some things in the other bathrooms.  Take a look:


The to do list:
-New Paint on walls-
-Paint vanity and add hardware-
-Marble Counter tops-
-Under-mount square sink-
-2 handle faucet-
-marble floors cut in 3x12 in-
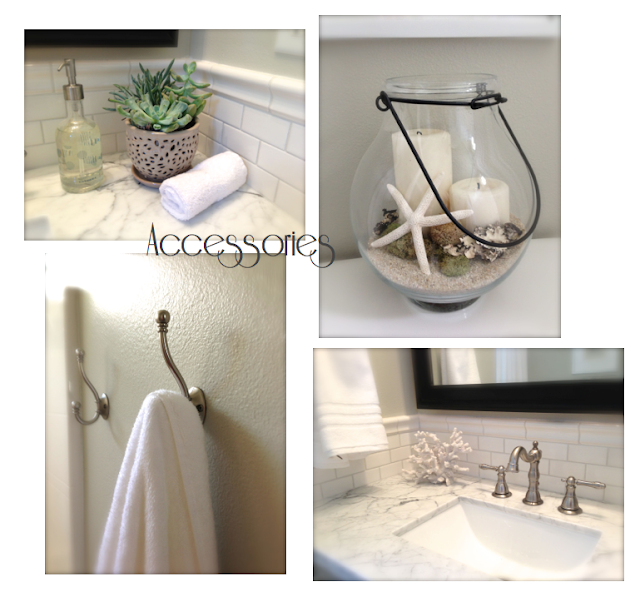
-new accessories-
-new clear glass shades on light fixture-
-white subway back splash-
-Cut mirror down, add wood frame & mirror pivots-


The Floors:


Master Bathroom


Half bath light fixture


I hope this inspires you to freshen up your bathroom! From a little paint to a major overhaul I promise either one will make your day!  Let me know if you have any questions on any of the specifics of my project! I hope my little boy will love his bathroom as much as I do!


Saturday, May 4, 2013

The Exterior


I am excited to share with you the face lift that we had on the outside of our house.  First off choosing paint colors was a little harder than I would have thought, mostly when choosing the white.  So my first tip is get lots of samples and paint them in different places around the house where you can see it in each light.  

Here are the colors that I chose for our home:


Sherwin Williams:
Dark Gray- Gauntlet Gray 7019
Light Gray- Mindful gray 7016
White Trim- Greek Villa 7551
Blue Door- Tempest Star 6229

First we had our rock re faced:


Then the painting:

BEFORE


AFTER:


In addition to the paint here is the break down of what else I did to spruce up the exterior:

Vinyl Lettering for the door and mailbox from Janey Mac


New Pillows for the Porch.  I found this fabric at Hobby Lobby and just made a pillow cover for some outdoor pillows I picked up at Wal-mart for about $8.


Fresh New plants for my pots


I picked up Carriage Door Hardware at Home Depot for about $20 to spruce up the garage.


I hope this inspires you to give your outdoors a new fresh look, whether its new paint or just some fresh flowers!

Wednesday, May 1, 2013

Fireplace Re-face

In part of getting ready for Spring (and the baby!) our house was in desperate need of a paint job.  Well if it needed painted then we should address the rock . . if we are doing the exterior rock we should do the fireplace inside. . . and the list just goes on right?!  That's what brings me to today's post.  Our house is painted (that will be my next post) and our rock is done.  I thought I would start by sharing the fireplace transformation.

Here is the inspiration photo in which I wanted my fireplace to somewhat mimic: 


Here is the BEFORE:


Here is the Rock that I chose:


Here is the AFTER pictures:


I hope you like it!  I love how much lighter it makes the room feel!  I wish that we could claim the labor on this project but we can't.  We hired out the tear down and install of our new rock.  By choosing a concrete made rock this project all together ended up being very affordable. Stay tuned for the reveal of my exterior house!
ENJOY!